Learning AI Poorly: You can start machine learning in 10 minutes... seriously

(previously posted on LinkedIn)
I finally broke down and replaced my about-to-die 2017 MacBook with a brand new one. For a minute I thought I was going to write something on how easy it is to get a fresh machine doing ML with some follow along steps to do it yourself.
That got real boring real quick so I decided to pivot to something more fun.
Do you have a Google account? Do you have five to ten minutes? Do you want to create a neural network, train it and use it to do some AI? Great! Follow along to do exactly that… for free… on Google Colab.
- Go to https://colab.research.google.com/ and log in with your Google Account.
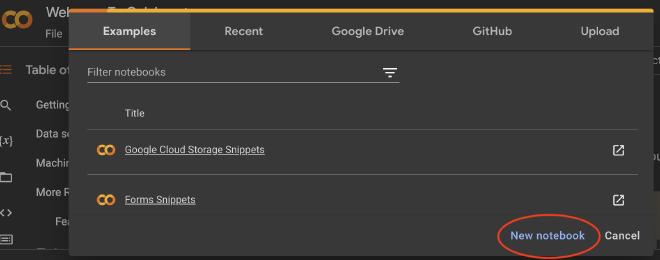
- Click on “New Notebook”

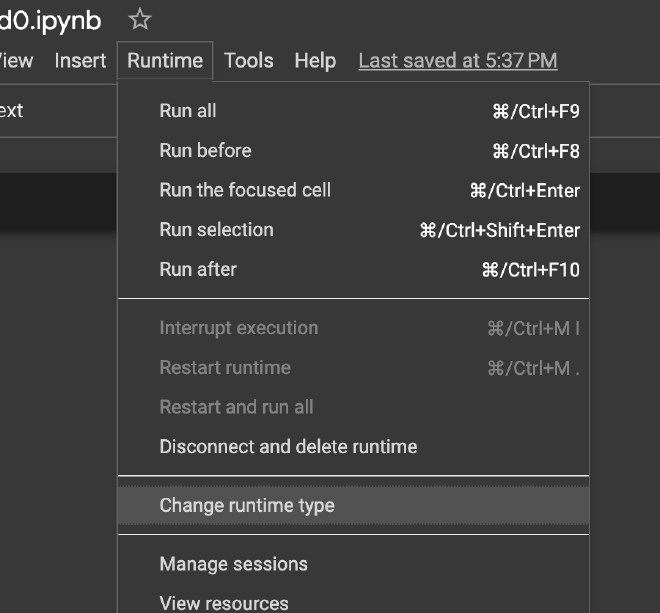
- Since you’re going to do ML, you want a GPU, right? Great! In the menu, go to Runtime-> Change Runtime Type

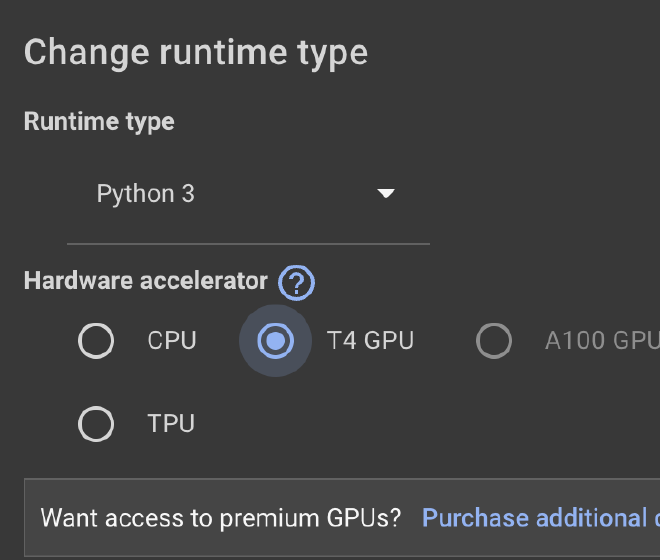
- Choose “T4 GPU”

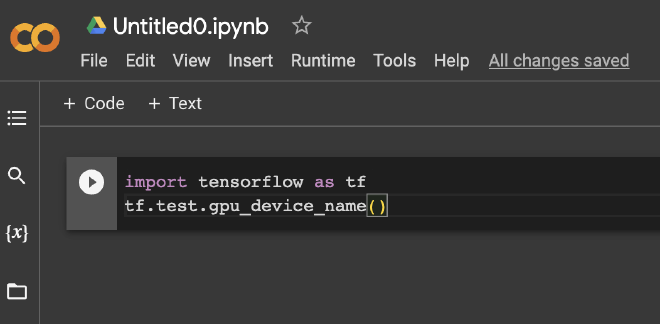
- Copy the following text:
import tensorflow as tf
tf.test.gpu_device_name()
into the first code cell (see the image to understand what I mean)

- Click that little “play” button to the left of the code you just pasted to run it. Something like “/device:GPU:0” will appear just under the code cell. CONGRATULATIONS!!!! You just ran some tensorflow code that checked to see if a GPU was present. That’s some ML codin'!
- Let’s actually do some ML. Delete the code you pasted above by highlighting it and hitting delete. Now copy the code below and paste it in the same place.
# Import libraries
from tensorflow.keras.datasets import mnist
import tensorflow as tf

# Load a dataset
(train_images, train_labels), (test_images, test_labels) = mnist.load_data()

# Preprocess the data
train_images = train_images / 255.0
test_images = test_images / 255.0
train_labels = tf.keras.utils.to_categorical(train_labels)
test_labels = tf.keras.utils.to_categorical(test_labels)

# Build a neural network
model = tf.keras.models.Sequential([
  tf.keras.layers.Flatten(input_shape=(28, 28)),
  tf.keras.layers.Dense(128, activation='relu'),
  tf.keras.layers.Dropout(0.2),
  tf.keras.layers.Dense(10, activation='softmax')
])

# Compiling the neural network
model.compile(optimizer='adam', loss='categorical_crossentropy', metrics=['accuracy'])

# Train the nerual network
model.fit(train_images, train_labels, epochs=5, batch_size=32)

# Evaluating the neural network
test_loss, test_acc = model.evaluate(test_images, test_labels)

print('Test accuracy:', test_acc)
- Hit that same play button. If you scroll down you’ll see some output below your code cell.

Congratulations. You just:
- downloaded a dataset of handwritten digits and got it in shape for use by a nerual network.
- created a nerual network with 4 layers, Flatten, Dense, Dropout, and Dense. This network will take in a 128x128 pixel image of a handwritten digit and it will output a list of 10 different probabilities. Each one represents the probability that the handwritten digit is a 1, or a 2, or a 3, etc.
- trained the network on a series of handwritten images that are labeled with the digit they actually represent.
- ran an evaluation step to see how well your network classified each image in a test dataset. In the screenshot above you’ll see the last line says “test accuracy: 0.9771283712987” or something.. that means it is about 97.7% accurate. Hopefully that took less than 10 minutes and now you can say you created your own neural network. neat!